by Anna Robinson-Sweet, Assistant Archivist, New School Archives and Special Collections
Many researchers who visit the Archives feel overwhelmed by the amount of information there is to take in. Luckily, we allow visitors to take photographs of material so that they can go back and read documents more closely. While photographs allow researchers to spend more time with archival materials, it can be hard to keep track of the origins of these photos. This is particularly problematic if they need to cite the item later on.
My colleague Jenny Swadosh wrote a very helpful post about best practices for taking pictures in the archives, particularly for the purposes of citation. To add to her advice in that post, there is a new tool available to researchers called Tropy, which is a citation manager along the lines of Zotero or Mendeley, but designed specifically for research photos. I tried it out myself while doing research to prepare for an oral history project on student activism at The New School. Below I’ll give a quick introduction to the features and capabilities of Tropy.
Getting started
Users can download the program for free on Tropy’s website. When you open Tropy for the first time you will be prompted to create a new “Project.” The project should describe your overall research project, such as the title of a paper, book, or exhibition you are doing research on. Within the project, you can organize your research by topic or section.
Importing Photos
After you have downloaded your research photos from your camera or phone, you can import them from your computer into Tropy by clicking File > Import Photos, or by dragging them into the Tropy project window. You will then see a list of your photos in Tropy.
Often, researchers are taking photographs of multiple pages that belong to the same document. Tropy accounts for this by allowing users to merge multiple photos into one “Item.” To do so, select all the photos of the same item, right click and select “Merge Selected Photos.” All of the photos will be combined under the filename of the first photo in the merge. In the navigation window on the right, you can see which photos are included in the item. Below, I’ll explain how to add a descriptive title to that item.

Adding Metadata
In Tropy, you can add metadata — or information about the item — to photographs, helping you keep track of what the item is and where it came from.
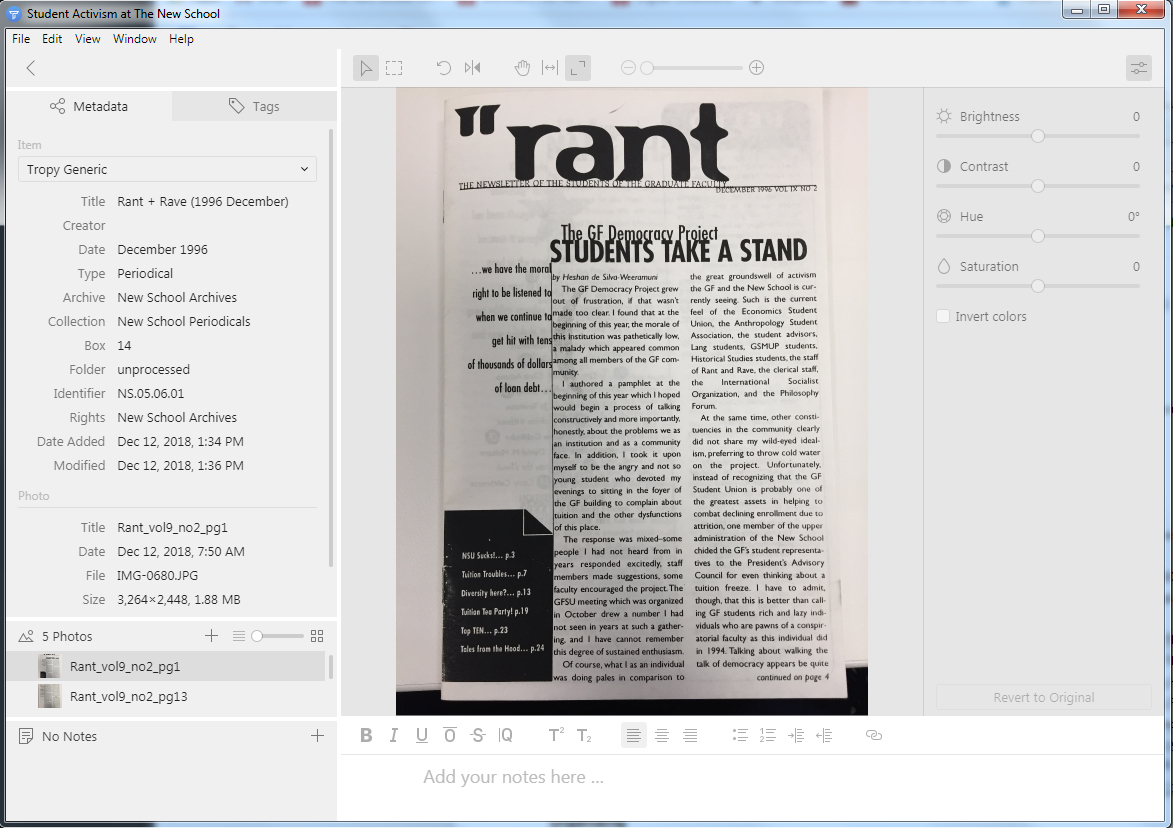
Below you will see an item that I added metadata to in Tropy. All of the fields in the left pane are editable. As you can see, the fields include which collection the item is part of, what the identifier for the collection or item is, and the box and folder number I found it in. It’s important to fill in this metadata, because these are required fields for creating complete citations in Chicago Style and many other formats. Noting the collection, box, and folder will also help you find the item again when you return to the archives. Additionally, Tropy automatically imports metadata about the photograph itself.
Editing images
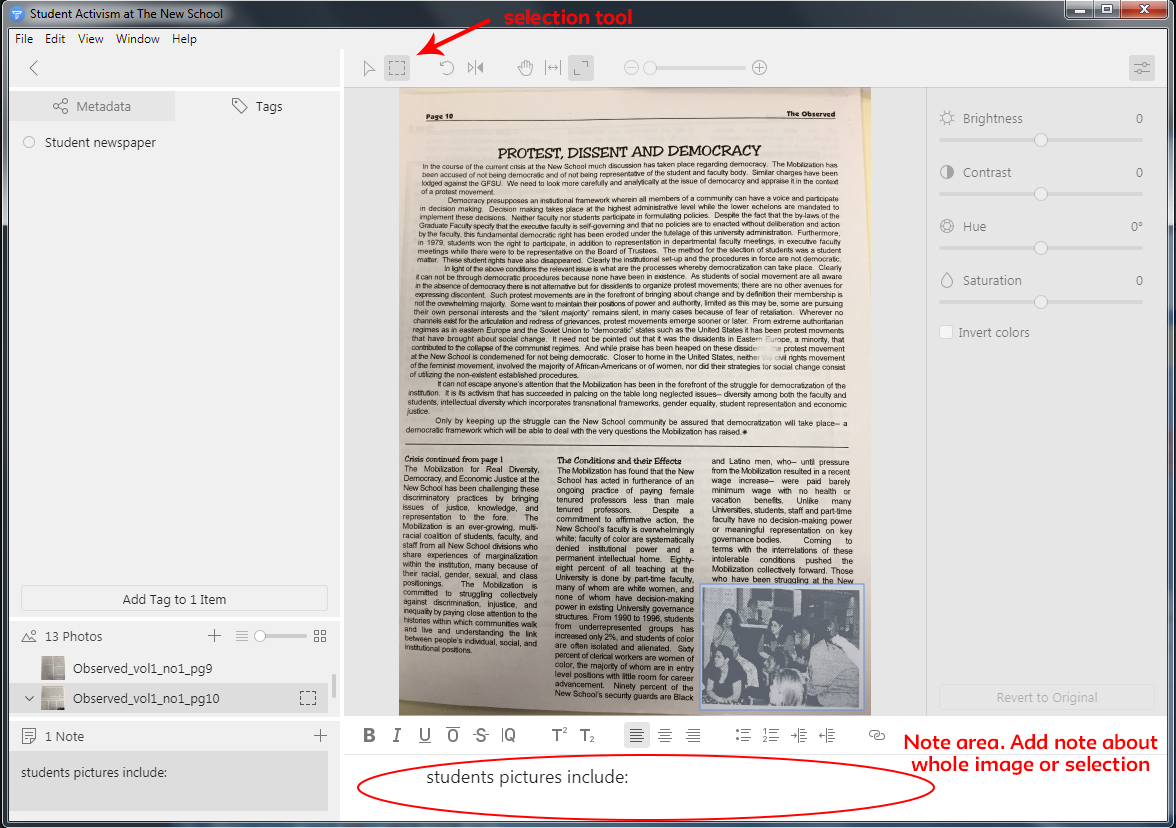
Tropy allows you to make some basic edits to images, including adjusting the contrast and rotating images. You can also use the selection tool (the rectangle icon above the image) to highlight a selection of an image (note this does not crop the image.) This is a nice feature because you can then add notes specific to that selection. Below, I selected a photo within a text document and added notes about it — you can also add a note about the entire image without selecting a section first. If you make a selection, it is nested within the item.
Important: if you make edits to photos in Tropy you need to save them before closing the program. You do so by clicking File > Consolidate Photo Library.
Organizing
There are a couple of ways to organize photographs in Tropy. One is by creating “Lists.” These lists can pertain to a particular topic in your larger research project, or a book chapter, for example. To create a new list select File > New > List. You can then drag items into these lists. Note that a copy of all items will remain in the project view, which is found above your lists in the left navigation pane.
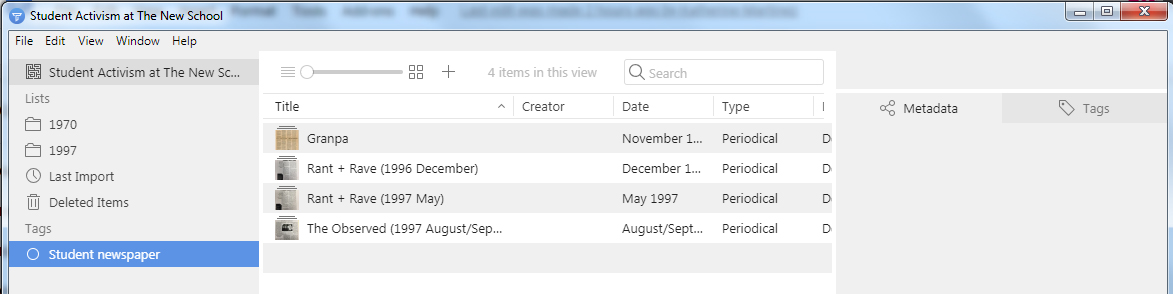
Tags offer another level of organization in Tropy. Tags can be anything you like and will group together items with that tag regardless of what list they are in. In the example below I created the tag “student newspaper” and added it to a few items from different lists. When I select that tag from the menu Tropy displays all the items with that tag.
Not only can you use Tropy to organize your own research photos, but you can also use these features to organize images you find online, including those on our Digital Collections site. You can use the “Notes” field to keep track of hyperlinks.
For more detailed instructions on using Tropy check out https://docs.tropy.org/.
Happy researching!